Grid method drawing: the complete handbook
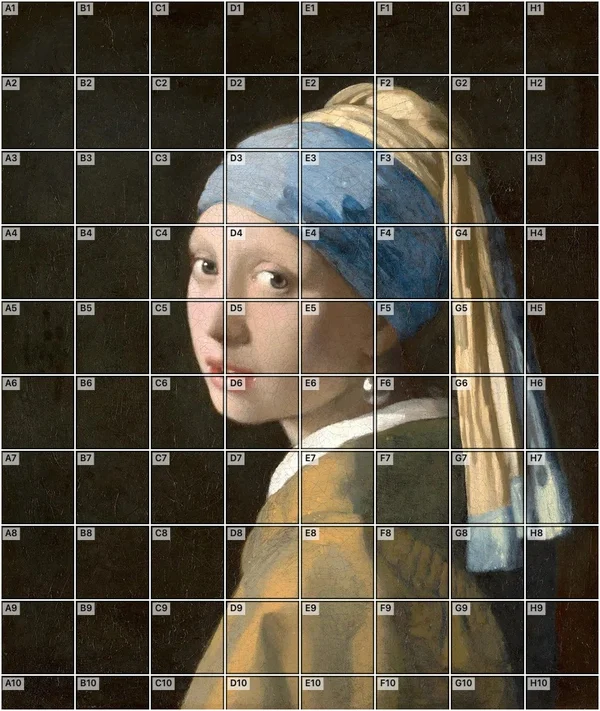
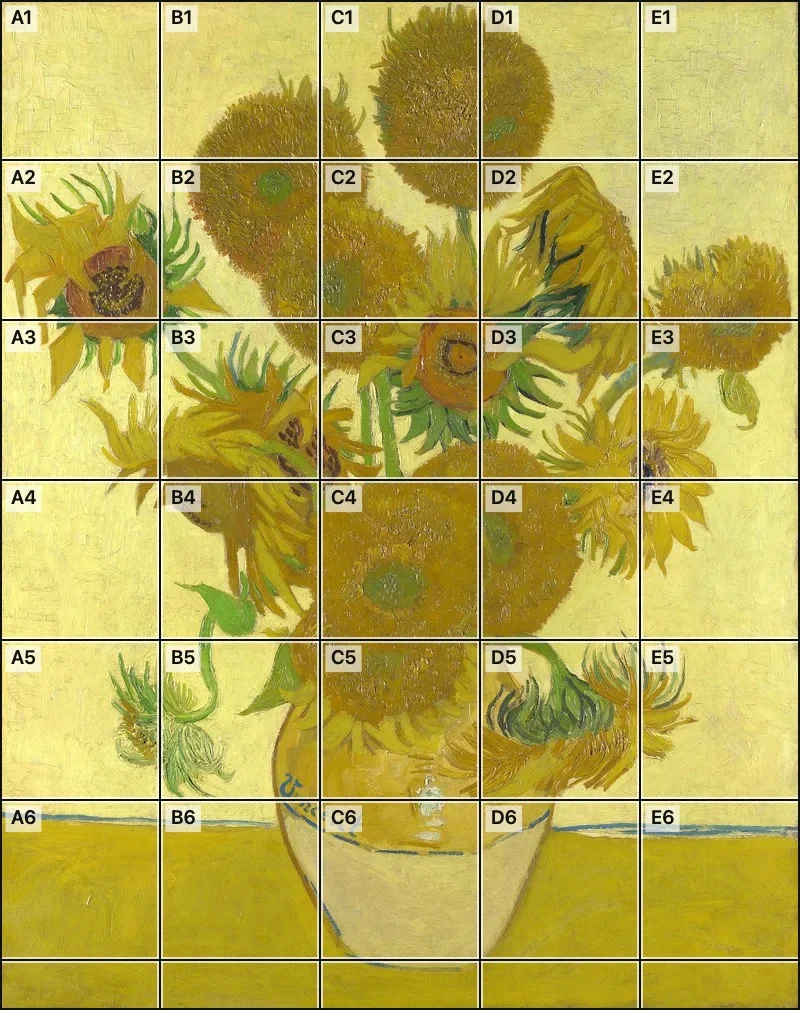
Step 1. Put a grid on your reference picture. Split the picture into equal squares and give each square a name, such as A1 for the top-left one. You can rule the lines on a print with a pencil, or let a program draw them.
Step 2. Draw the same grid on your paper. Use light pencil lines. The paper needs the same number of columns and rows as the reference. The squares can be any size, as long as they are all equal.
Step 3. Copy one square at a time. Look at square A1 on the reference and draw only what is inside it in square A1 on your paper. Then do B1, then C1, across the row and on to the next one.
Step 4. Erase the grid and finish. When the outlines are in place, rub out the grid lines and add the shading.
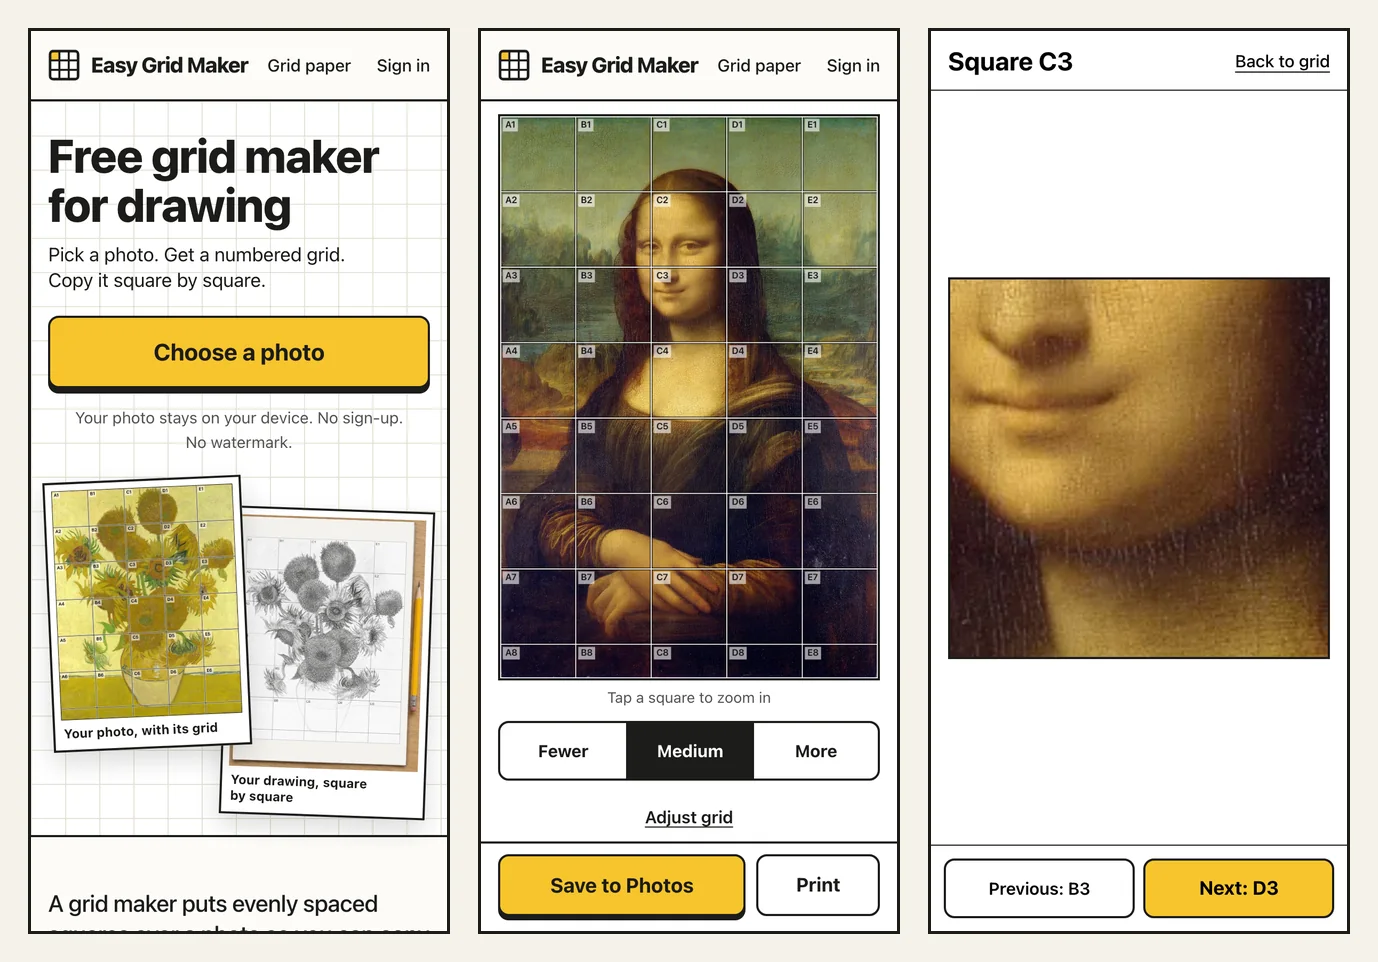
The steps on a phone: pick a picture, get the grid, open any square large to see what is in it.
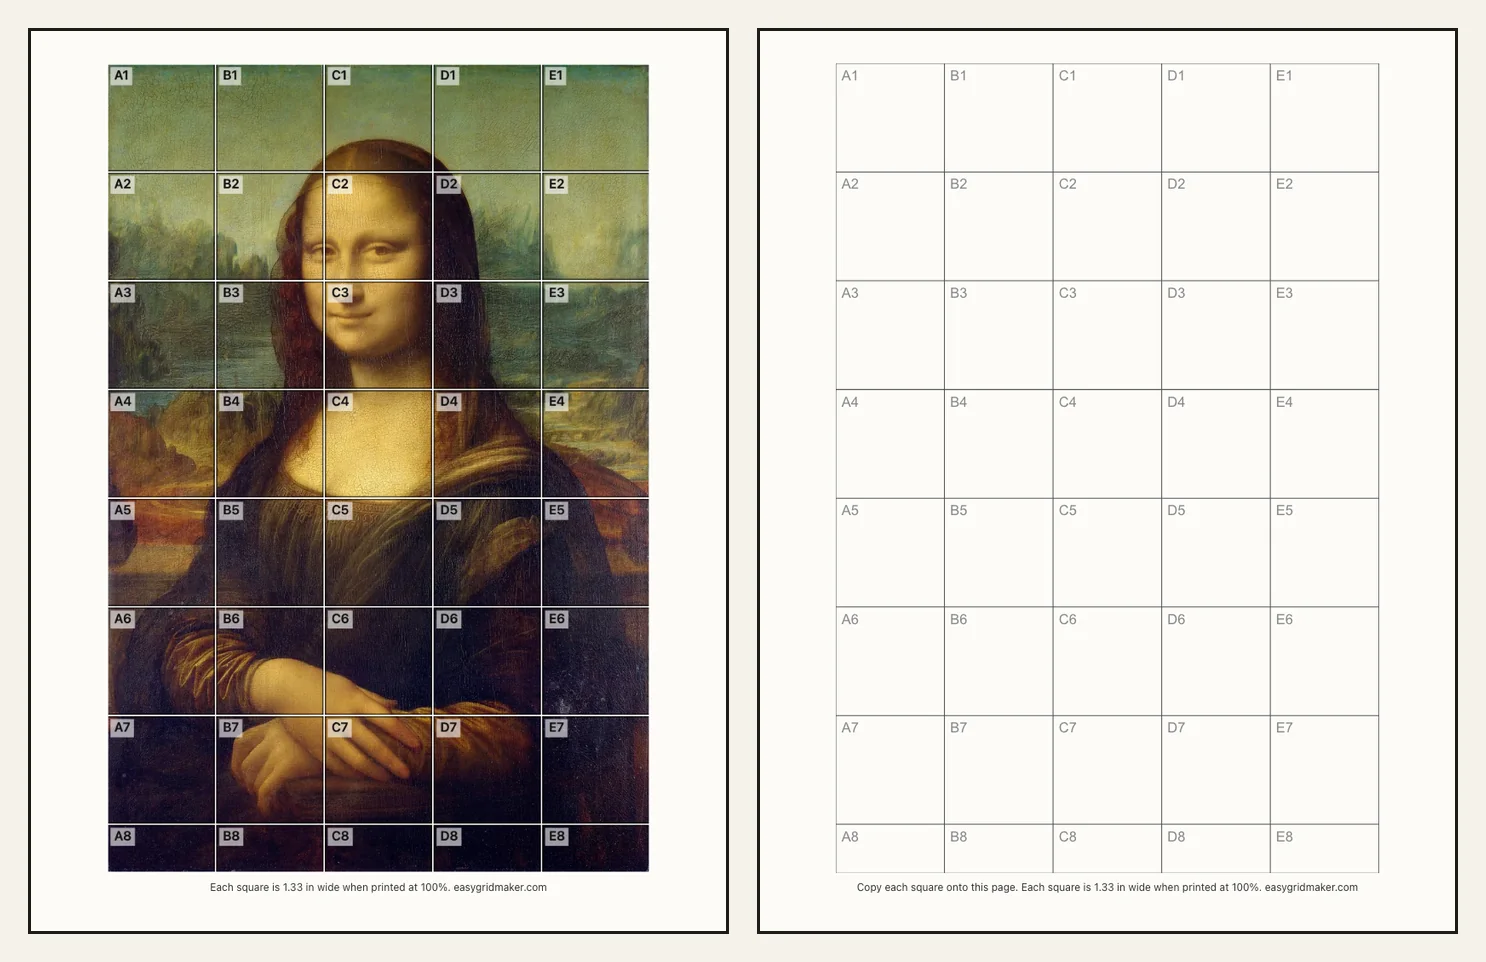
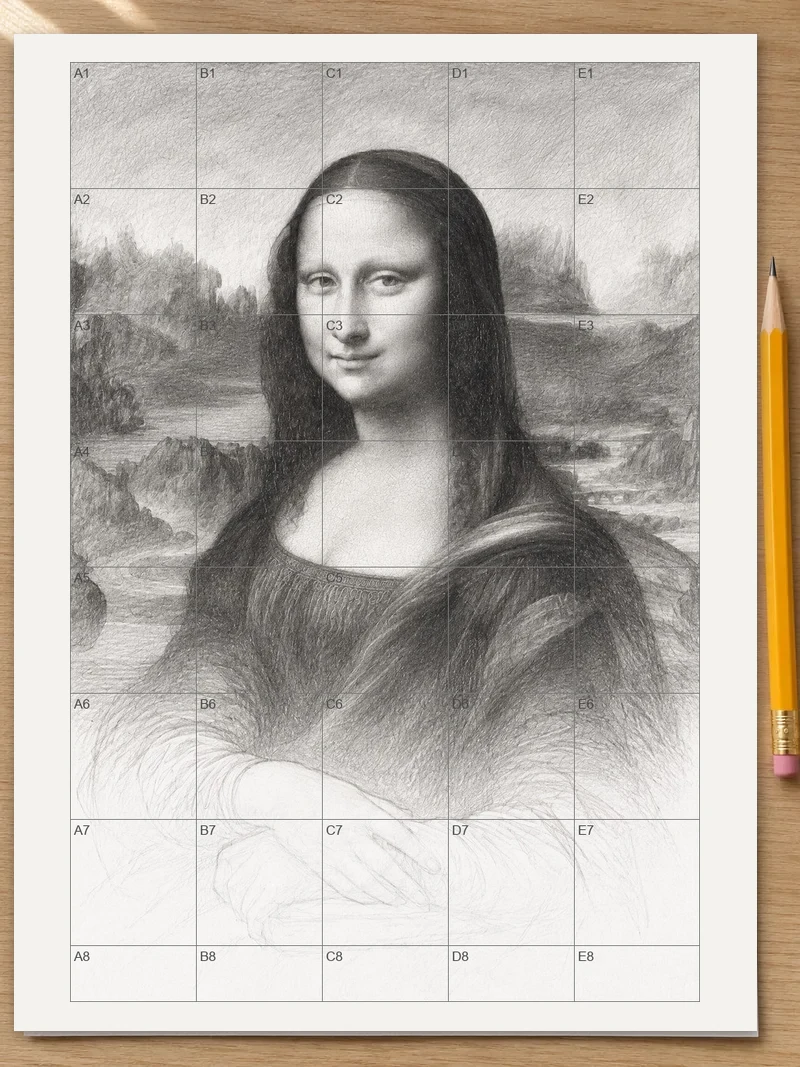
The same grid printed twice: once over the picture, once empty to draw on.
That is the whole method. The rest of this handbook covers the choices that decide whether it goes well: which picture, how many squares, how to work out sizes, and how to fix a drawing that drifts.
In this handbook
- What the grid method is
- Picking a reference picture
- How many squares to use
- Working out the size of your squares
- Ruling a grid by hand
- Copying what is inside a square
- Fixing common problems
- Drawing a portrait with a grid
- Teaching the grid method to a class
- Scaling up to a wall or mural
- A short history
- Questions people ask
- Sources
What the grid method is
The grid method moves a picture from one surface to another, usually a larger one. The J. Paul Getty Museum's glossary describes the same process under the word "squared": both surfaces are ruled into an equal number of squares, and the lines in each square are carried across by hand (Getty). You will also see it called squaring up.
It works because a small square is easier to judge than a whole picture. A face is a hard thing to get right. The curve of a cheek crossing a square two-thirds of the way down its left edge is not. You stop drawing "an eye" from memory and start drawing the shape that is actually there.
Picking a reference picture
Spend a minute on this before anything else. A poor reference makes every later step harder.
- Choose clear light. Shadows with a definite edge give you shapes to copy. A flat, dim photo leaves you guessing where one area ends and the next begins.
- Use the largest copy you have. You will be looking closely at small parts of the picture, and a small file turns to blur.
- Crop first. If you only want the face, cut away the background before adding the grid, so the squares are spent on the part you care about.
- Match the shape of your paper. A tall picture wants tall paper. The next section but one shows how to check this with numbers.
- For a first try, pick something simple. A single flower, a mug or a pet's head has fewer shapes than a crowded street, and finishing a drawing teaches more than abandoning a harder one.
How many squares to use
More squares means less to judge in each one, and more squares to get through. Fewer squares means bigger jumps by eye.
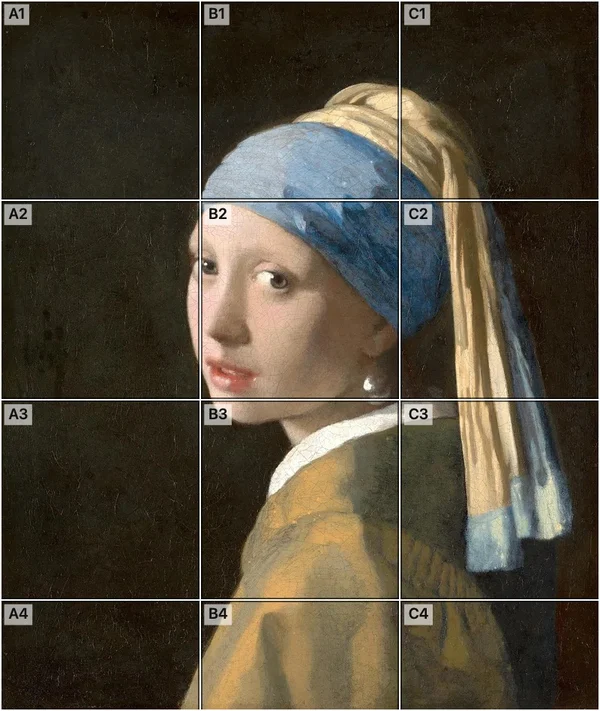
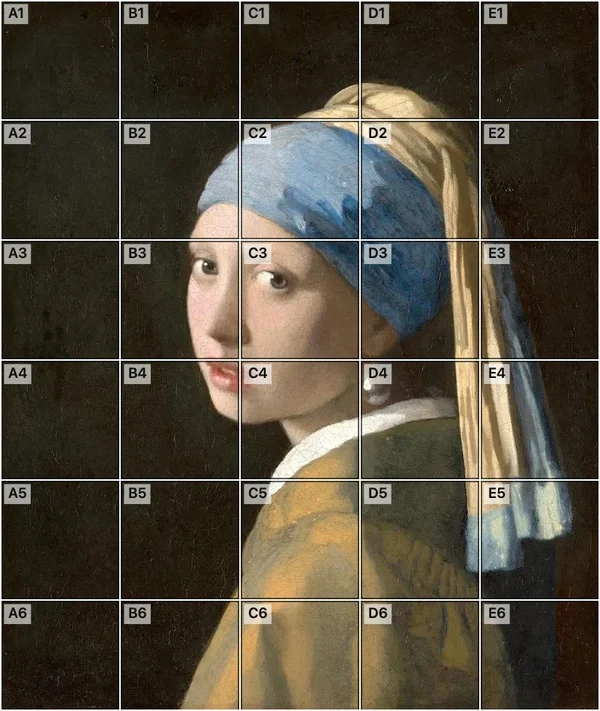
The same picture with 3, 5 and 8 squares across its short side.
These are starting points, not rules:
| What you are drawing | Squares across the short side |
|---|---|
| A young child's first grid drawing, or a very simple shape | 3 or 4 |
| A still life, a pet, or a landscape with a few large shapes | 5 or 6 |
| A portrait at about letter-paper size | 8 |
| A detailed portrait, or anything with lots of small parts | 10 to 12 |
A useful test: look at the busiest square on your reference. If you cannot describe what is in it in a sentence, the squares are too big. You can also go finer later: divide only the difficult squares in half and leave the rest alone.
Working out the size of your squares
Everything comes down to one sum:
drawing width ÷ number of columns = width of one square
Say your grid has 5 columns and 7 rows, and your drawing should be 10 inches wide. That gives 10 ÷ 5 = 2 inch squares, and the drawing will be 7 × 2 = 14 inches tall.
Now check it fits the paper before ruling anything. Here are a few worked examples, all with full squares:
| Grid | Square size | Drawing size |
|---|---|---|
| 4 × 5 | 1 inch | 4 × 5 inches |
| 4 × 5 | 3 inches | 12 × 15 inches |
| 5 × 7 | 2 inches | 10 × 14 inches |
| 6 × 8 | 3 cm | 18 × 24 cm |
| 8 × 10 | 2.5 cm | 20 × 25 cm |
The shape of the drawing follows the shape of the grid, and you cannot change that without stretching the picture. An 8 × 10 inch photo on 9 × 12 inch paper is the classic trap. Fill the width of the paper and the scale is 9 ÷ 8 = 1.125, so the drawing is 11.25 inches tall. That fits, with three-quarters of an inch to spare. Fill the height instead and the drawing would be 9.6 inches wide, which does not. When in doubt, work from the side that runs out first.
Ruling a grid by hand
You need a long ruler, a sharp pencil and a light touch.
- Decide on the square size using the sum above.
- Mark that spacing along the top edge of the drawing area, then again along the bottom edge. Measure each mark from the same starting point instead of from the last mark, so small errors do not add up.
- Join the matching marks with a ruler. These are your vertical lines.
- Do the same down the left and right edges for the horizontal lines.
- Measure both diagonals of the whole grid. If they match, the corners are square.
- Write the column letters along the top and the row numbers down the side, outside the drawing area, so you never lose your place.
Press lightly. A dark line is hard to rub out and it can leave a groove that shows up later under shading. If you do not want to erase anything at all, you can put a printed grid under thin paper on a window or light box and draw over it.
Copying what is inside a square
This is the part that actually makes the drawing. Work through it in this order for each square.
- Mark where lines cross the edges. Find where each line in the reference enters and leaves the square, and estimate the spot: halfway along, a third of the way, near the corner. Put a small dot in the same spot on your paper.
- Join the dots. Now look at how the line travels between them. Is it straight, or does it bow out? Draw it lightly.
- Add the shapes in the middle. Things that do not touch an edge come last. Judge them against the sides of the square.
- Look at the neighbour. The line leaving this square must arrive at the same point in the next one. If it does not, fix it now while the mistake is small.
Three habits make this easier:
- Name shapes, not things. Tell yourself "a dark wedge in the lower corner" rather than "the nostril". What you know about noses is the thing that makes noses go wrong.
- Hide the rest. Cut a small window in a piece of card and lay it over the reference, so you see one square at a time.
- Turn both upside down. This makes a familiar subject harder to recognize, so you are more likely to draw what you see.
Save shading until the outlines are in place, and keep your early lines light. Any line that lands in the wrong square can then be erased cleanly.
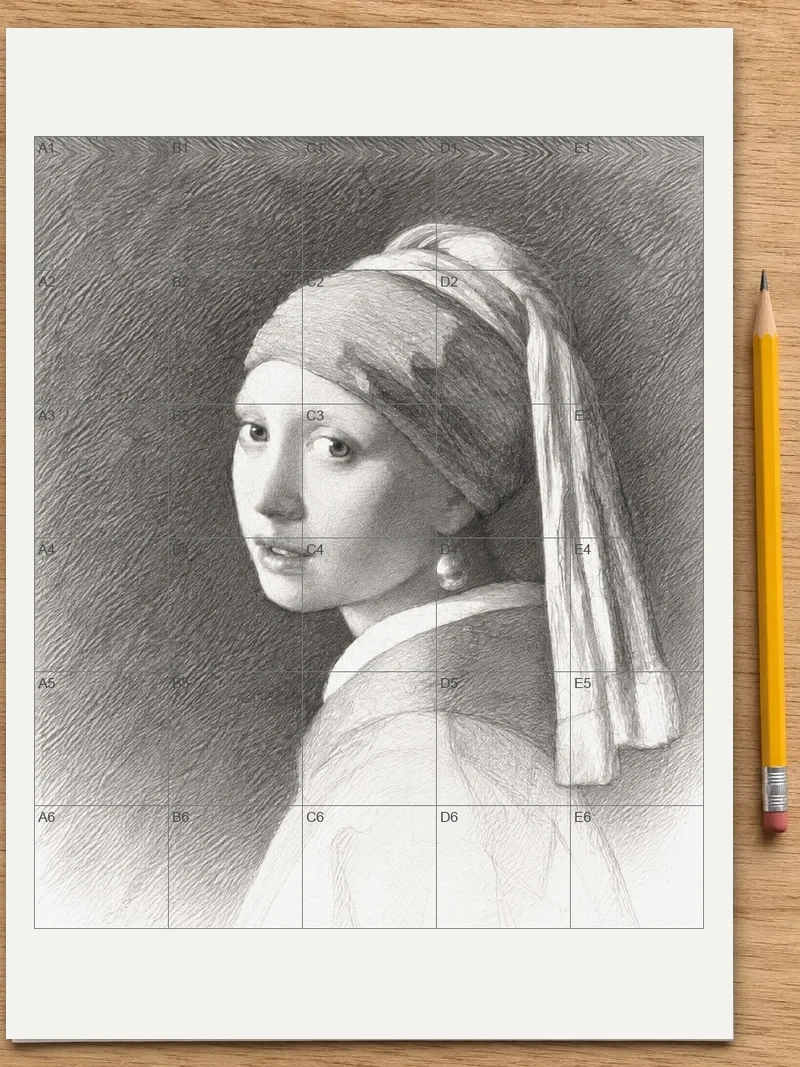
A sample image of a drawing part way through, working square by square.
Fixing common problems
| What you see | Likely cause | What to do |
|---|---|---|
| The drawing looks stretched | The grid on the paper is not the same shape as the grid on the reference | Recount the columns and rows, and check the squares on the paper are truly square |
| Lines do not meet at square edges | The edge crossings were guessed after the line was drawn | Mark the crossing dots first, then draw between them |
| Everything looks right but the face looks wrong | Small errors in the features | Divide the squares around the eyes and mouth in half and check those again |
| The grid shows through the finished drawing | Lines were too dark | Press more lightly next time; a kneaded eraser can lift a lot of graphite from this drawing |
| The picture runs off the page | The sizes were not checked first | Do the sum, then rule a smaller square size |
| A square feels impossible | Too much is happening in it | Add a line across the middle in each direction on both the reference and the drawing |
Drawing a portrait with a grid
Faces punish small errors more than anything else: a line a few millimetres out on a wall is nothing, but on an eye it changes the person. So give a portrait more squares than you would give a landscape, and add half-square lines around the features.
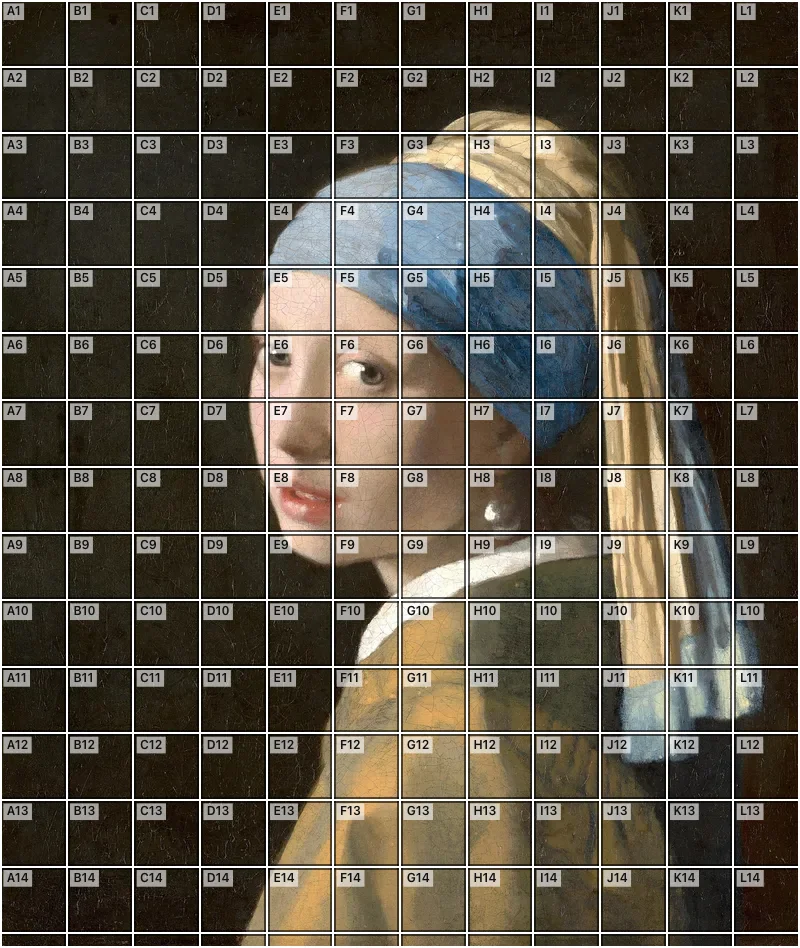
Twelve squares across leaves each square with only one small piece of the face.
Before starting, check where the features fall. Note which square holds the inside corner of each eye, the tip of the nose, and the corners of the mouth. Getting these few points right gives the rest of the face something to hang on.
Then copy in reading order as usual. It can feel strange to draw half a cheek and a bit of background with no face in sight yet. That is the method working, because you are not yet tempted to draw what you think a face looks like.
Leave the grid in place until the features are checked, because it also helps you measure. Once the likeness is there, erase it and shade.
Teaching the grid method to a class
A grid gives a whole class a shared language. "Check the line in C3" means the same thing to everyone, and a student can ask for help with one square rather than a whole picture.
- Start small. A simple picture on a 3 × 3 or 4 × 4 grid takes a single lesson and gets each student to a finished piece.
- Introduce upside-down copying early. It takes away the fear of "I can't draw faces".
- Try a class picture. Cut a large image into squares and give each student one to enlarge on their own card. When the cards are put back together, the picture appears, and every student's part mattered.
- Show a real artist's use of it. The painter Chuck Close built large portraits out of grids: the Buffalo AKG Art Museum notes that "through the use of a grid system, Close creates paintings that are composed of many squares" (Buffalo AKG). Students who think a grid is a beginners' trick tend to look again after seeing one of those paintings.
Scaling up to a wall or mural
The sum is the same, only the units change. A design with 10 columns going on a wall 20 feet wide needs squares 2 feet wide.
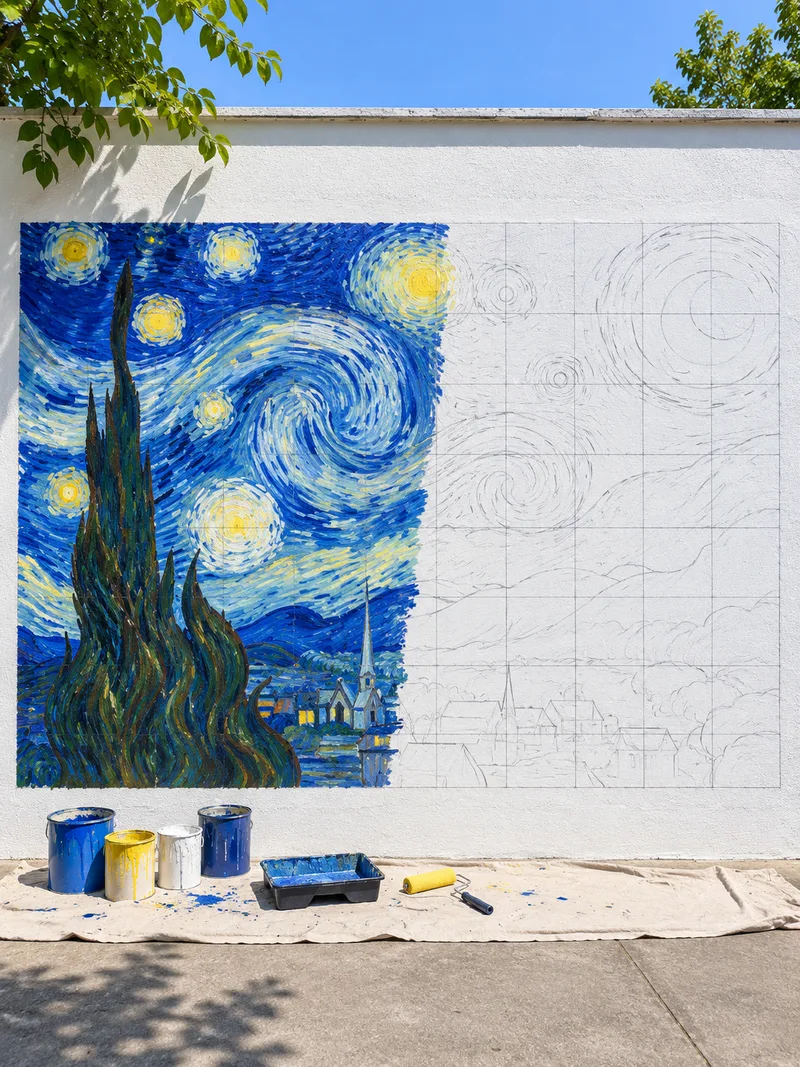
A sample image of a wall grid: squares ruled first, then outlines, then paint.
A few things change at this size:
- Measure from a level line. Walls and floors are rarely true. Use a level to set one horizontal line and one vertical line, then measure everything from those.
- Use a chalk line. One person holds each end of the string and it is snapped against the wall. Chalk is quick to put down and easy to wipe away or paint over.
- Number the squares on the wall. You will be standing too close to see the whole picture, and the names are what keep you on track.
- Print the reference large. Keep the gridded design on a board you can carry along the wall.
- Check often from far away. A curve that looks right at arm's length can be plainly wrong from across the street.
Muralists also use a variation called a doodle grid: free scribbles and symbols on the wall that give many reference points for the sketch. Artist Joey Allen, interviewed by WFDD public radio, says a measured box grid "takes a while to get everything measured out perfectly" and describes the doodle grid as another way to scale a small sketch up to a large wall (WFDD).
A short history
The method is very old. The British Museum holds an ancient Egyptian wooden drawing board covered in plaster, with a squared grid ruled in red and a seated king drawn on it (British Museum, EA 5601).
In Europe, a woodcut by Albrecht Dürer from his book on measurement, Underweysung der Messung, shows a draughtsman drawing a model through a wooden frame with a grid (Explore Visual Culture). The Hood Museum at Dartmouth dates the design to 1525 (Hood Museum), and the Metropolitan Museum of Art holds an impression it dates to about 1600 (The Met).
Questions people ask
Is using a grid cheating?
My view: no. It is a measuring method with a long history, as the section above shows. What you still have to do yourself is look carefully and make every mark. If your goal is to train your eye without help, draw without a grid some of the time as well, then use a grid to check how close you came.
Does the grid method help you learn to draw?
It trains you to look at shapes rather than at what you think something looks like, and it gives a beginner a finished drawing to feel good about. It does not teach everything: light, form and composition need their own practice.
What size squares should a beginner use?
Use squares big enough to draw in comfortably, around 1 inch or 2 to 3 cm on letter or A4 paper. If a square looks crowded, split it in half rather than starting over with a smaller grid.
Can I use a grid on a tablet or for digital art?
Yes. Save the picture with its grid, bring it into a drawing app and draw on a new layer above it, or set the gridded picture beside your canvas and rule a matching grid.
Do I have to erase the grid?
Only if it would show. Under dark paint or heavy shading it may disappear by itself. On a light pencil drawing, erase it before you shade, because it is harder to remove afterward.
Can I use the grid method with paint?
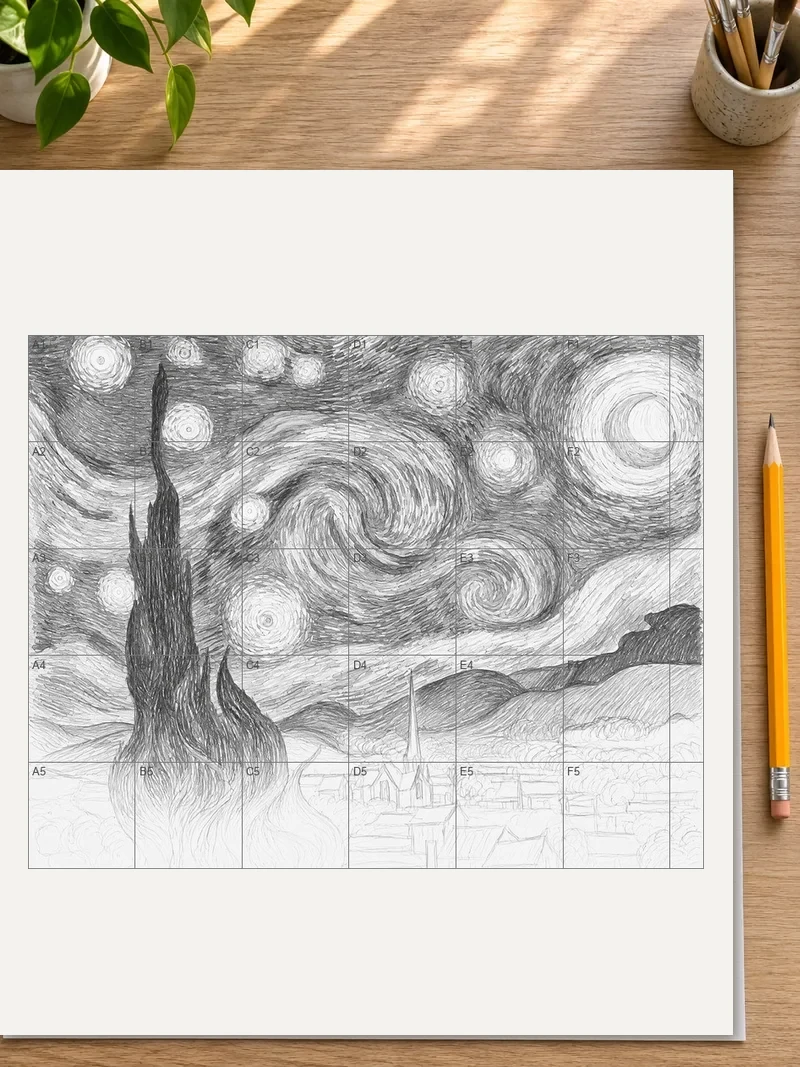
Yes. Draw the grid on the canvas in thinned paint, pencil or charcoal, block in the outlines square by square, then paint over them. Keep the lines thin and light so they do not show through pale colors.
Sources
- J. Paul Getty Museum, glossary entry for "squared"
- British Museum, drawing board EA 5601
- Hood Museum of Art, Dartmouth, Albrecht Dürer woodcut
- The Metropolitan Museum of Art, Albrecht Dürer woodcut
- Explore Visual Culture, notes on the same woodcut
- Buffalo AKG Art Museum, on Chuck Close
- WFDD, on doodle grids
Try it
Put a grid on your picture with the free grid maker. More pages on the same subject:
- Portrait grid for faces, with more squares
- Printable grid paper to draw on
- Square grid with the columns and rows you choose
- Rule of thirds grid for planning a picture
- Add a grid to a photo