What is the scumbling technique in painting?
Scumbling is a painting technique: you drag a thin, broken layer of opaque paint over dry paint so the color underneath shows through. It needs a dry underlayer first. Choose a photo here and you get numbered shapes with a color chip for each number, a ready plan for that first layer.
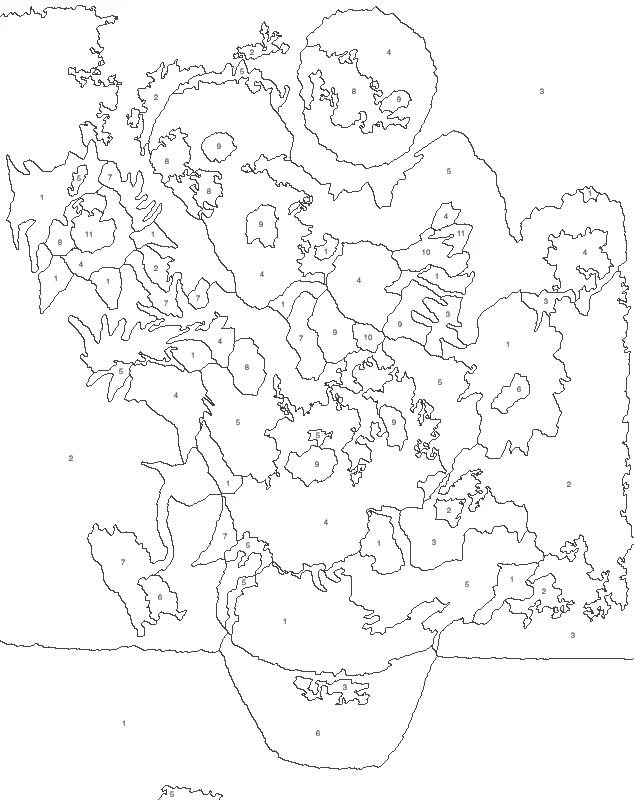
Scumbling means brushing a thin, uneven layer of opaque paint over a dry layer so some of the first color stays visible. The result is a soft, hazy or textured surface. Paint the underlayer first, let it dry, then scumble over it with a lightly loaded brush.
How to use scumbling
Choose a photo
Press “Choose a photo” and pick an image with clear areas of light and shadow. Skies, hills, water and fabric give good ground for scumbling later.
Pick the number of colors
Use 8 colors for large, simple shapes or 12 for more variety. “More settings” offers 4 to 24 colors, smoothness, and numbers on or off.
Check the numbers and the chips
Switch the view between numbers and colors, and compare each numbered shape with its color chip under the picture. Download the PNG when the sheet looks right.
Paint, dry, then scumble
Fill the shapes with flat color and let every layer dry completely. Then drag a lightly loaded brush of opaque paint over the areas that need haze, glow or texture.
Use scumbling where a surface looks too flat
Look at your underpainting from a few steps back and mark the areas that feel dead. A blue sky that sits like a painted wall, a far hill with a hard outline, a cloth with no surface: these are the places to scumble. A thin veil of lighter paint softens an edge, lifts a highlight or pushes a background back.
Scumbling is also a good finishing move. Once the main shapes are in and dry, a few light passes can tie two neighboring colors together without blending them while wet.
Prepare a dry underlayer first
Let the first layer dry completely before you touch it. Press a clean fingertip on a thick spot: if it feels cool or tacky, wait. Wet paint underneath will mix with the new layer and turn muddy, which is the opposite of the broken effect you want.
Flat, separate shapes make a good base. Fewer colors give larger shapes that are easier to scumble over. More colors give a richer base but smaller areas to work around. Paint each numbered shape in its chip color, keeping the paint even and opaque.
Load the brush lightly
Take a small amount of opaque paint, straight from the tube or only slightly loosened. Wipe most of it off on a rag or the edge of the palette until the brush leaves a skipping mark when you drag it across a scrap. Too much paint fills the gaps and covers the color underneath.
If the paint feels sticky and will not skip, press the brush on the rag again. A little more paint can always be added; removing it from a dry canvas is much harder.
Pick the brush and the pressure
A large, flat brush gives broad, airy coverage. An old, worn brush with uneven bristles gives a rougher texture. A palette knife, dragged flat with almost no pressure, leaves a crisp broken edge. Some painters even use a household brush for a coarse effect.
Skim the surface. Light pressure lets paint catch only on the tooth of the canvas and the ridges of the dry layer. Pressing harder scrubs the paint into the gaps and smooths it out.
Vary your strokes
Change direction and length as you work. Regular, repeated marks read as a pattern, and the eye catches them at once. Follow the form where you can: curve strokes around a hill, run them along a fold of cloth, and let them wander softly in a sky.
Do not rub or smudge once the paint is down. Make a pass, step back, and add another light pass only where it is needed. Layers build slowly, and the effect gets better with restraint.
Choose the color over the color
Light over dark gives the most visible haze. A pale, warm gray scumbled over a dark blue hill looks like mist. Warm over cool brings a glow to a shadow. A contrasting or complementary color, such as a touch of orange over blue, makes the surface vibrate a little because the eye mixes the two.
Use opaque paint for the top layer. Test the combination on a scrap of dry paint before you commit to the real canvas.
Know the difference from glazing
A glaze is translucent paint laid in an unbroken film. It deepens and enriches the color below. Scumbling is the reverse: opaque paint in a broken layer, usually lighter, which softens and cools the area it covers.
The two work together. Glaze a shadow to make it richer, let it dry, then scumble a pale passage over the lit side. If a painting has too much contrast, a scumble over the darkest part can bring it down.
Know the difference from dry brushing
Dry brushing uses very little paint and a stiff, dry brush, giving scratchy streaks. Scumbling usually carries a little more paint and a lighter touch, which gives a smoother, hazier veil. A brush that is wet will smooth the paint out, so keep it dry for both.
Know the difference from scribbling
In drawing, scribbling is quick, aimless marking. A scumbled passage has a purpose: it sits over a finished layer, it is light enough to let the base show, and it is built up in a planned order. Think of it as controlled looseness.
Give the paint something to catch
A smooth, slick surface fights scumbling. Rough canvas, a ground with fine sand mixed into the gesso, hardboard or even corrugated cardboard gives the paint more tooth. Texture in the underpainting helps too, because ridges catch the dragged paint and leave the hollows showing the color below.
Plan the order of layers
Work from dark to light and from broad to fine. Paint the flat shapes, let them dry, glaze if you need depth, then scumble the broad areas first and the smaller touches last. For a cloudy sky, a coarse pass of pale gray across the whole area can be followed by a finer pass of white only along the cloud tops.
Write the plan on the margin of your printed sheet before you begin. A short list such as “sky first, hills second, water last” saves you from scumbling over an area that still needs a layer under it.
Leave detailed areas alone
Do not scumble where you need crisp edges: eyes, small lettering, the edge of a window frame. A broken veil blurs exactly what must be sharp. Keep these for last, and paint them cleanly on top of or beside the scumbled areas.
Quick checklist before you start
- The underlayer is fully dry.
- The paint is opaque and the brush is nearly dry.
- Pressure is light and strokes change direction.
- Light goes over dark, or warm over cool, as planned.
- Passes build gradually, with a pause to look between them.
Scumble in oil, acrylic or watercolor
Oil paint gives the most time to work, but the underlayer must be dry to the touch before the scumble goes on, which can take days. Alkyd paints dry faster and suit this job well. Acrylic dries within the hour, so the underlayer is ready quickly, but the top layer also stiffens fast: keep a rag at hand and work in short passes.
In watercolor the idea changes. Drag a barely damp brush across rough paper so the pigment catches only the raised grain, and the paper left white acts as the light layer.
Try three scenes on a scrap panel
Before touching the real painting, paint a small scrap in three flat patches: dark blue, mid green and warm brown. Then scumble pale gray over the blue for mist, a lighter green over the green for sunlit grass, and a thin cream over the brown for worn cloth. Ten minutes of this shows how much paint the brush should carry and how hard to press.
Apply it to a sky or a portrait
For a sky, let the flat blue dry, then drag a pale, nearly dry brush across the lower part in long, uneven strokes so the blue glows through toward the horizon. Add a few shorter, curved passes where clouds gather.
For a portrait, keep the scumble away from the eyes and mouth. Use a thin, warm light tone on the forehead and cheekbone to lift a highlight, and a cool gray at the edge of the jaw to push it back. Two or three gentle passes are usually enough.
Photograph your progress
Take a photo of the painting after each dry layer. Seen small, a scumbled passage that looks right up close can read as dirty or too busy. Comparing the pictures tells you where to stop.
FAQ
What is scumbling, and what does scumble mean?
Scumbling is a technique where a thin, broken layer of opaque paint is brushed over dry paint, so the color below shows through in patches. To scumble means to apply paint this way. The effect is a soft, hazy or rough surface, useful for skies, mist, fabric and worn textures.
What is scrumbling?
“Scrumbling” is a common misspelling of scumbling. People searching for it almost always mean the painting technique of dragging a thin layer of opaque paint over a dry layer so the color underneath still shows through.
Is scumbling the same as scribbling?
No. Scribbling is loose, random marking with no plan. Scumbling is a controlled painting method: a lightly loaded brush skims dry paint to leave a broken, see-through layer. The strokes can look loose, but color, pressure and layer order are chosen on purpose.
When should I use scumbling in art?
Use scumbling when an area looks too flat or too sharp. It softens color transitions, adds a glow to highlights, breaks up a plain background, and gives cloud, water, fabric or skin a surface with some life. It also works well as a finishing touch over dry paint.
Can a paint by number sheet serve as an underpainting?
Yes. The numbered shapes give you a flat, planned first layer in a limited set of colors. Fill them in, let the paint dry fully, and scumble over the dry shapes wherever you want softer edges or a lighter, hazier surface.
Can I scumble with acrylic paint?
Yes. Let the acrylic underlayer dry fully, which takes much less time than oil, then drag a lightly loaded brush of opaque acrylic over it. Work in short passes, because acrylic stiffens quickly on the brush and can start to pull or lift the layer below.
Can I scumble over paint that is still wet?
It is better not to. Wet paint underneath mixes with the new layer and turns muddy, which cancels the broken effect. Wait until the first layer is dry to the touch, then drag a lightly loaded brush of opaque paint across it. Oil takes days to dry, while acrylic is ready much sooner.
How much paint should be on the brush?
Very little. Wipe the loaded brush on a rag until it skips and leaves a patchy mark on scrap paper. If the stroke covers the color below evenly, the brush holds too much paint, so wipe it again and use lighter pressure.
Updated
Related tools
- 10x10 gridPrint a blank 10x10 grid with 100 squares in three sizes. Add numbers 1 to 100, then print the sheet or save it as a clear PNG.
 4 Quadrant Graph PaperPrint free 4 quadrant graph paper with bold x and y axes, numbered both ways from 0. Pick square size and paper, then save as PDF, PNG or JPG.
- 8x8 gridPrint a free 8x8 grid of 64 squares in your browser. Pick Small, Medium or Large squares, add letters and numbers, then print or save a PNG.
 Add grid to photoAdd a grid to any photo in your browser, with no sign-up and no watermark. Get a numbered grid or a plain grid overlay, then save it or print it at true size.
- Ar TracingInstead of ar tracing with a phone stand, put a numbered grid on your own photo, then save or print it and copy it square by square. Free, no sign-up.
 Aspect Ratio CalculatorUse this aspect ratio calculator to turn a width and height into a ratio like 16:9. You also get the decimal and a resize that keeps the shape.
- Atmospheric PerspectiveAdd a numbered grid to a photo and compare near and far squares to see atmospheric perspective: lighter values, softer color. Free, in your browser.
- Bargue DrawingPractice Bargue drawing from your own photo: add a numbered grid with 5, 8 or 12 squares across, then save it or print a gridded sheet and an empty one.