How do I turn a photo into a stencil I can print?
Choose a photo and the page turns it into a black and white stencil that you can download as a PNG and print. The photo to stencil conversion keeps only two colors, so every area is either solid or empty, which is what a stencil needs. Fewer, Medium and More set how much detail stays. Everything runs in your browser, so the photo is never uploaded.
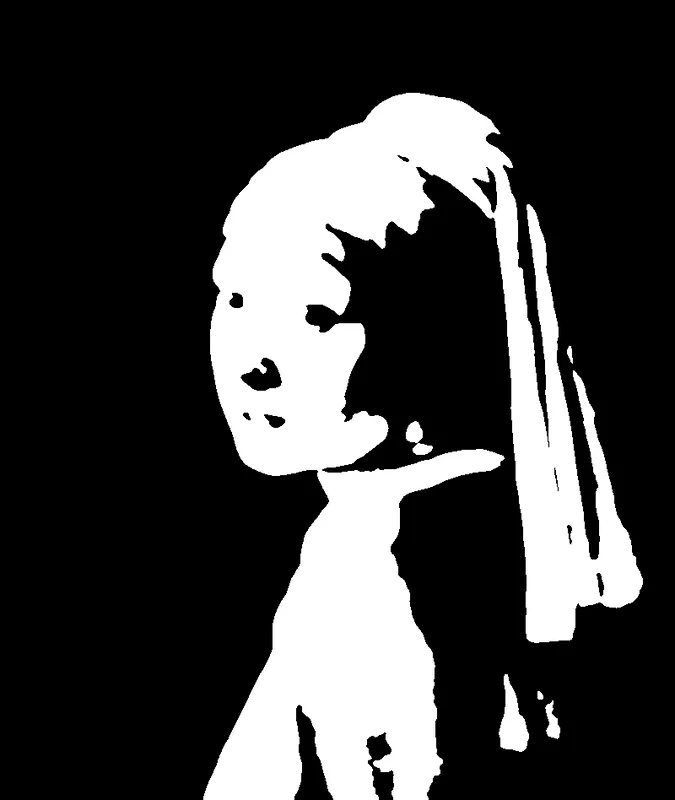
Choose the photo, and the page makes the stencil in one step. It cuts the picture into two colors and cleans away small specks. The result downloads as a PNG that is 1500 pixels along its longest edge, ready to print. Start on Medium, then try Fewer or More if the shapes look too plain or too busy.
How to turn a photo into a stencil
Choose a photo
Press “Choose a photo” and pick a picture from your phone, tablet or computer. A clear subject against a plain background gives the cleanest shapes.
Set the detail
The stencil appears in two colors. Try Fewer, Medium or More until the shapes suit the way you plan to cut or paint. Medium is where it starts.
Check the colors
Open “More settings”. Use “Swap black and white” if the parts you will cut out are the wrong color. Use “Show my photo” to compare the stencil with the original.
Download and use
Download the PNG, which is 1500 pixels along its longest edge. Print it from your device, then cut along the edges between the two colors or trace the shapes onto card.
Pick a photo that cuts well
Look for a picture with one clear subject and a strong difference between light and dark. A portrait lit from the side turns into clean shapes. So do a dog in front of a plain wall, a bicycle against the sky and a bold flower. Flat, even light or a crowded background leaves the two colors with no obvious place to divide.
Crop before you choose. If only the face matters, crop the picture in your phone’s photo editor first so the subject fills the frame. A subject that fills the frame keeps more detail in the PNG than the same subject small in a wide shot.
When you take a new photo for a stencil, use daylight from a window and choose a plain backdrop. Stand the subject a little away from the wall so no shadow falls behind it.
Match the stencil to the way you will make it
Cutting by hand
A craft knife, a cutting mat and a sheet of card or stencil film suit a printed PNG well. Every shape you cut is a small job, so Fewer is the kinder choice for a first stencil. Save More for a second try, once you know how much cutting you enjoy.
Painting on wood, fabric or a wall
Paint passes through the openings only, so thin slivers and tiny dots tend to blur or tear. Large, bold shapes survive a brush or a can of spray paint much better. Fewer or Medium usually reads well from a distance, which matters on a sign, a tote bag or a wall.
Tracing
A stencil also works as a simplified drawing guide. Lay tracing paper over the printout and follow the edges between the two colors. Flat shapes are easier to fill in than a photo full of gradual shading.
Read the black and white result
Decide first which color is the part you will remove. Cut away the black and let paint pass through, or the other way round. Either works. If the result is the opposite of what you wanted, open “More settings” and press “Swap black and white”.
Next, look for islands. Islands are pieces surrounded completely by the opposite color. The center of an O, the hole in an A, a pupil inside an eye and the inside of a ring are all islands. Cut them out and they fall away, taking the design with them. Before cutting, draw a small gap in the outline with a pencil so each island stays joined to the sheet by a thin tie. These ties are called bridges, and they show up as little breaks in the painted line.
Then look for stray dots. A speck smaller than the tip of your knife is not worth cutting, so skip it.
Compare the three detail levels
Press Fewer, Medium and More in turn and watch the eyes and mouth first, because those features carry a likeness. If the face is still recognizable on Fewer, stay there and enjoy the easier cutting. If the expression disappears, move up one level.
Watch hair and fur as well. More keeps strands as thin lines, which looks lively on screen and takes patience with a blade. “Show my photo” in “More settings” lets you check the original against the result so you can judge what was lost.
Print, cut and use
Open the downloaded PNG in your photos app or file manager and print it from there. Print at the size of the finished work. If the design needs to be bigger than one sheet, use the image splitter to cut the picture into equal tiles. Print the tiles separately and tape them together.
Tape the stencil flat with painter’s tape before you paint, because a lifted edge lets paint creep underneath. Load the brush or sponge lightly, press straight down and dab instead of dragging. Lift the stencil straight up so the wet edges do not smear.
Test on scrap first
Run one trial on scrap paper or cardboard with the same paint you plan to use. A test shows at once whether the bridges are thick enough, whether the thin shapes bleed and whether the whole design is the right size. Fixing a stencil with a pencil and a fresh cut costs a few minutes. Fixing a painted shirt or wall costs far more.
Keep the first printout, too. If the test shows the shapes are too fine, go back, choose Fewer, download a new PNG and compare the two sheets side by side.
FAQ
How do I convert a normal photo to a stencil?
Choose the photo and the stencil appears in two colors only. Pick Fewer, Medium or More for the amount of detail, then download the PNG. Print it and cut along the edges between black and white, or trace the shapes onto card or stencil film.
Is there an app that turns pictures into stencils?
You do not need one. This page runs on a phone, a tablet or a computer, with no install and no sign-up. Choose a photo, adjust the detail and download the PNG. The photo is read on your own device and is never uploaded.
How do I get the best results from a free picture stencil maker?
Start with a photo that has one clear subject and a strong difference between light and dark. A face lit from the side or an animal against a plain wall works well. Busy backgrounds and flat light give noisy shapes. Then compare Fewer, Medium and More.
What do Fewer, Medium and More change?
They set how much detail the stencil keeps. Fewer gives larger, simpler shapes, Medium is the starting point, and More keeps finer detail such as hair, fur or small lines. Try all three on the same photo and compare the results before you download.
What does “Swap black and white” do?
It trades the two colors, so areas that were black become white and the other way round. Use it when the parts you want to cut out or paint through come out as the wrong color. “Show my photo” in the same menu lets you compare.
Is the PNG free to download?
Yes, the PNG downloads free at 1500 pixels along its longest edge, with no sign-up. The photo stays on your device the whole time, because it is read and processed in the browser and never sent to a server.
Updated
Related tools
- 10x10 gridPrint a blank 10x10 grid with 100 squares in three sizes. Add numbers 1 to 100, then print the sheet or save it as a clear PNG.
 4 Quadrant Graph PaperPrint free 4 quadrant graph paper with bold x and y axes, numbered both ways from 0. Pick square size and paper, then save as PDF, PNG or JPG.
- 8x8 gridPrint a free 8x8 grid of 64 squares in your browser. Pick Small, Medium or Large squares, add letters and numbers, then print or save a PNG.
 Add grid to photoAdd a grid to any photo in your browser, with no sign-up and no watermark. Get a numbered grid or a plain grid overlay, then save it or print it at true size.
- Ar TracingInstead of ar tracing with a phone stand, put a numbered grid on your own photo, then save or print it and copy it square by square. Free, no sign-up.
 Aspect Ratio CalculatorUse this aspect ratio calculator to turn a width and height into a ratio like 16:9. You also get the decimal and a resize that keeps the shape.
- Atmospheric PerspectiveAdd a numbered grid to a photo and compare near and far squares to see atmospheric perspective: lighter values, softer color. Free, in your browser.
- Bargue DrawingPractice Bargue drawing from your own photo: add a numbered grid with 5, 8 or 12 squares across, then save it or print a gridded sheet and an empty one.